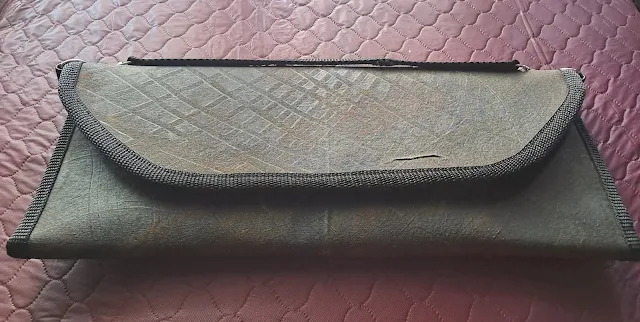
Embark on a creative journey as you learn to make your very own Envelope Clutch with painted fabric – a stylish and personalized accessory that reflects your unique taste. This DIY project seamlessly merges the artistry of fabric painting with the practicality of a clutch, resulting in a one-of-a-kind fashion statement.
Start by selecting a plain fabric in the desired color and texture for your clutch. Unleash your inner artist as you paint or stencil captivating designs onto the fabric, adding a touch of your personality to the project. Once your painted fabric is ready, follow simple sewing instructions to transform it into a chic envelope-style clutch.
The beauty of this project lies in its versatility. Experiment with different paint colors, patterns, and fabric textures to tailor your clutch to match various outfits and occasions. From casual outings to special events, your painted fabric envelope clutch will be the perfect accessory to showcase your unique style and creative flair. Get ready to make a bold fashion statement with this DIY Envelope Clutch project!
I designed the fabric with paint to make it look like leather, then I created the pattern which can be modified to suit your unique style. Download the pattern here.
👉After downloading the pattern, you can watch the video on my channel @sewlyjo
To make an envelope clutch the easy way with painted fabric, you will need:
- 1/2 yard of fabric (cotton, canvas, or vinyl work well)
- Fabric paint
- Paint brushes
- Sewing machine
- Thread
- Scissors
- Sewing needle
- Sewing clips
- Magnetic snap closure (optional)
Instructions:
- Wash and dry your fabric.
- Paint your fabric design. You can use a variety of techniques, such as freehand painting, stenciling, or stamping.
- Allow the paint to dry completely.
- Cut two pieces of fabric for the clutch, measuring 12 inches by 18 inches each.
- Place the two pieces of fabric right sides together and sew along the long edges, leaving a 4-inch opening at the bottom.
- Trim the corners and clip the curves.
- Turn the clutch right side out and press flat.
- Sew the opening at the bottom of the clutch closed.
- (Optional) Attach a magnetic snap closure to the front of the clutch.
Your envelope clutch is now complete!
NCW wallet click this ⏩ NCW wallet.
Tips:
- If you are new to fabric painting, there are many tutorials available online.
- If you are using a stencil, be sure to use fabric paint that is specifically designed for stencils.
- If you are making a vinyl clutch, be sure to use paint that is specifically designed for vinyl.
- If you do not have a sewing machine, you can sew the clutch by hand using a sewing needle and thread.
- If you want to add a lining to your clutch, cut two pieces of lining fabric the same size as the clutch pieces. Sew the lining pieces together, right sides together, leaving a 4-inch opening at the bottom. Turn the lining right side out and insert it into the clutch, matching the seams. Sew the opening at the bottom of the lining closed.
This is a very easy way to make a stylish and unique envelope clutch. With a little creativity, you can create a clutch that is perfect for any occasion.


0 Comments